Introduction
INGInious auto-grader allows instructors to create assignments in many different programming languages that can be auto-graded. This tool also supports Moodle integration via LTI. The best way to learn about using INGInious is to view the official documentation.
Reference Links
Official site: https://www.inginious.org/
Official Documentation: http://inginious.readthedocs.io/en/latest
CU Self-hosted Site: https://inginious.csel.io
Source Code: https://github.com/UCL-INGI/INGInious
Access Request
If you would like access to our self-hosted INGInious please request access at help@cs.colorado.edu
The self-hosted software has a tutorial with 10 examples of types of questions which you can view to understand how to construct auto-graded assignments. We also have a sandbox with a collection of various auto-graded tasks from different courses to serve as an example as well.
Course Request
If you would like a new course setup please let us know what term & course # and we will create a new course for you.
Once you have your auto-graded tests configured and tested you can use the LTI to integrate with Moodle. This allows students to access INGInious in Moodle and also capture the grade and store it in the Moodle grade book automatically. To setup the LTI, please use the LTI instructions that are attached to this section.
Linking Course to Moodle
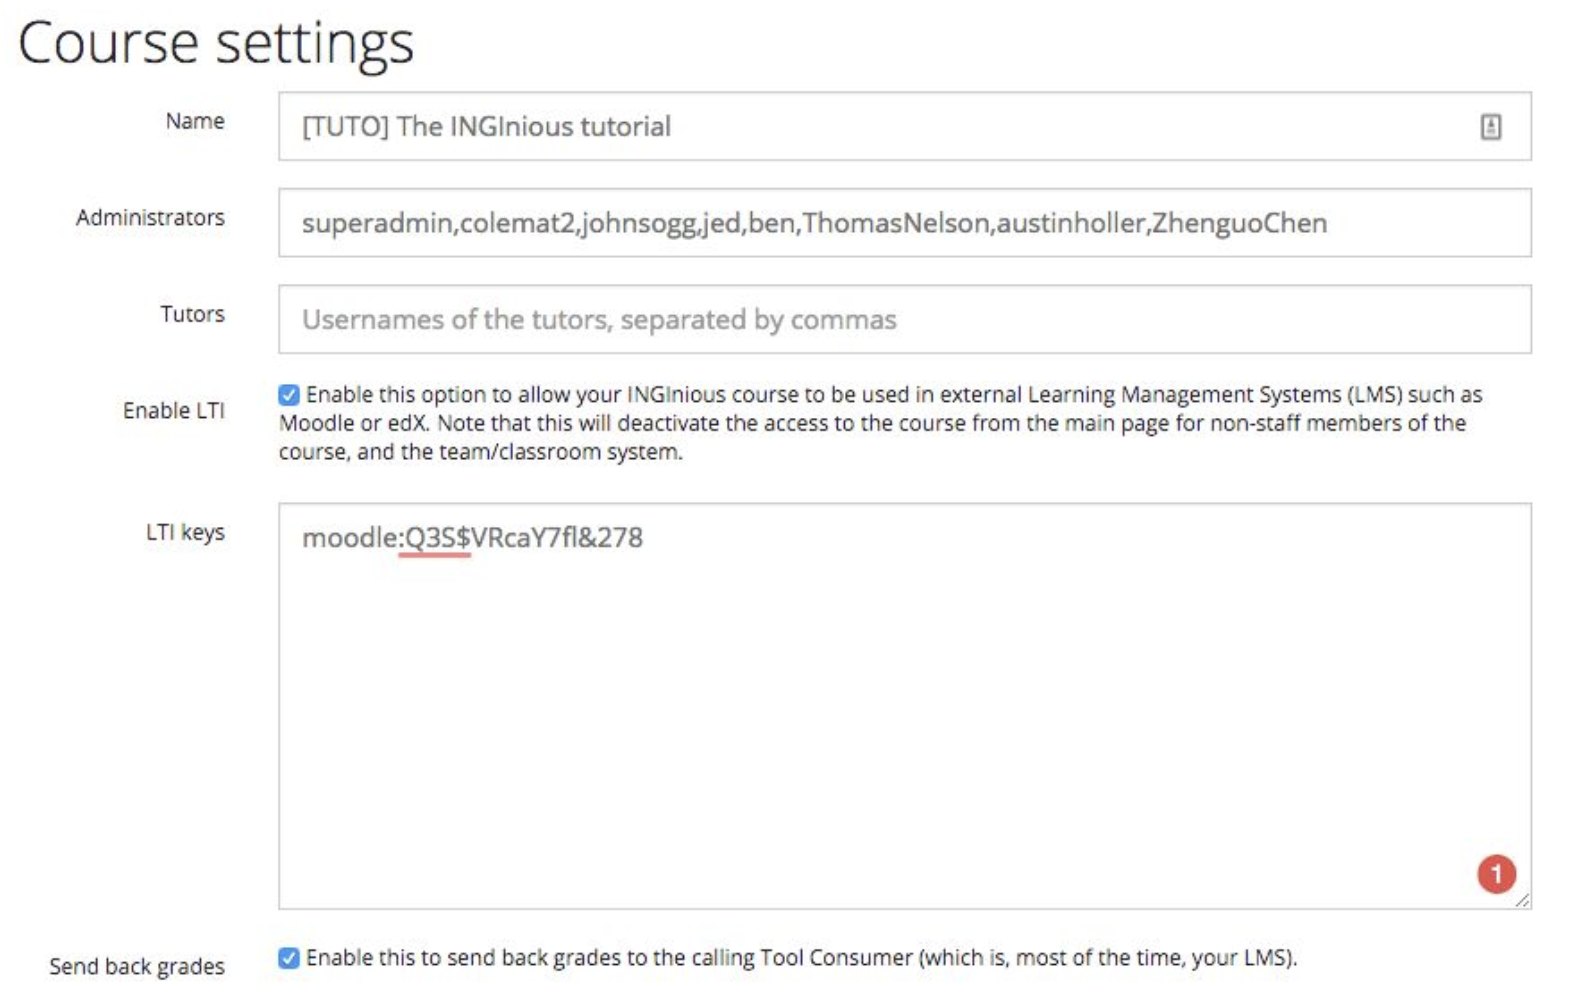
- In your course administration page in inginious.csel.io, make sure you have the following LTIcheckboxes enabled and LTI keys configured.
- Enable LTI: This allows Moodle to use INGInious using LTI. This must be checked.
- Send back grades: Check this if you want INGInious to send a grade to Moodle (most likely you do).
- LTI Keys: You need to create a consumer and secret keys (consumer:secret) to use with Moodle. These can beanything but the secret key should be set to something of a strong password length. Below I have theconsumer=moodle and secret=Q3S$VRcaY7fl&278. You will use these keys when setting up the LTI activity in Moodle.
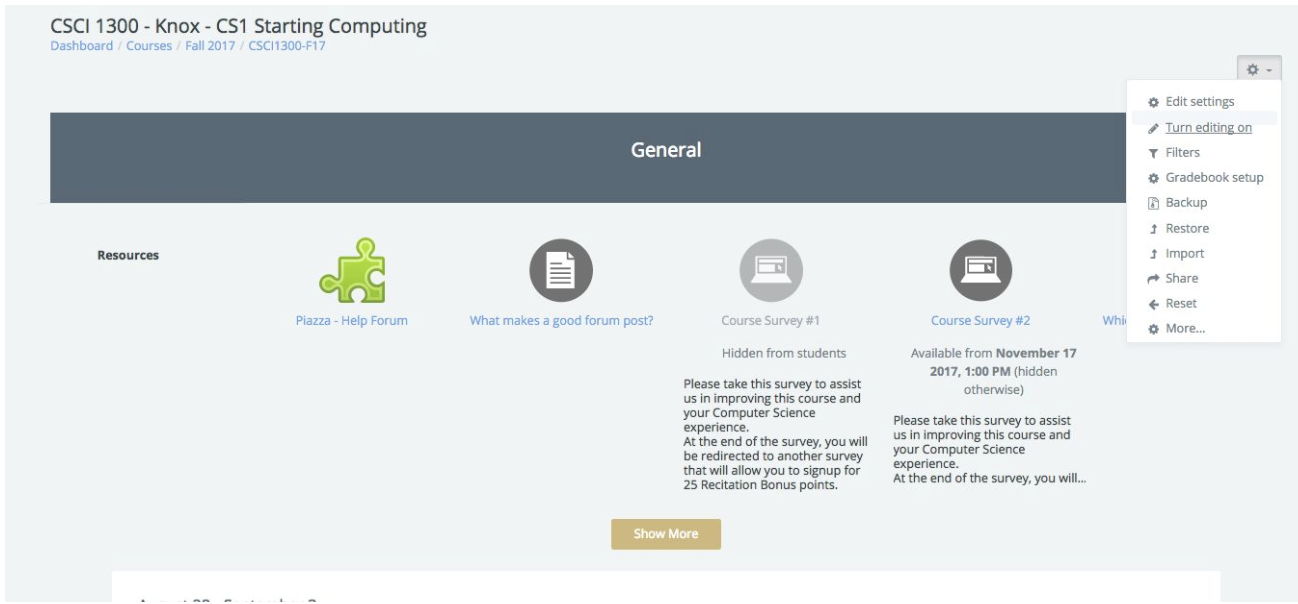
- Go to your main course page in Moodle and turn editing on.
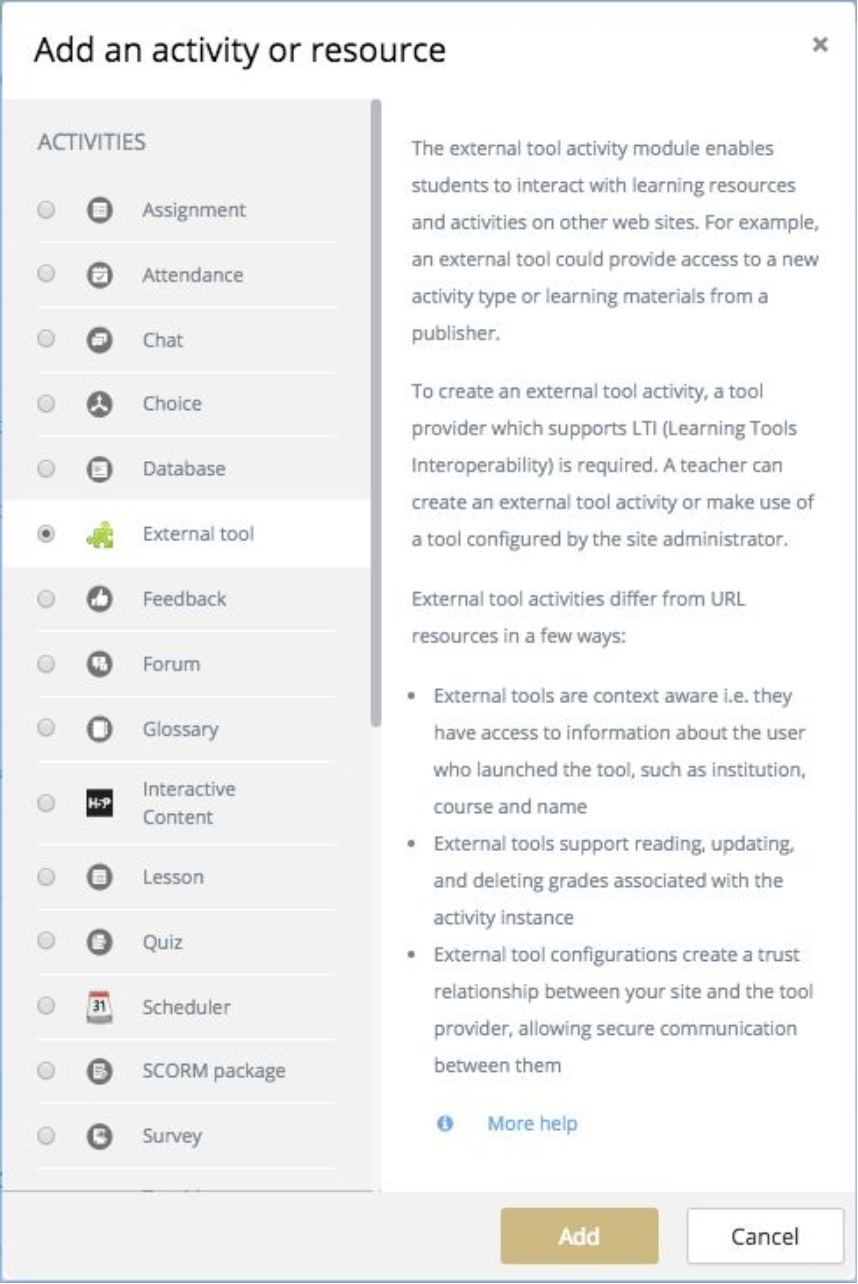
- Click “Add an activity or resource” and choose “External Tool” and click “Add”
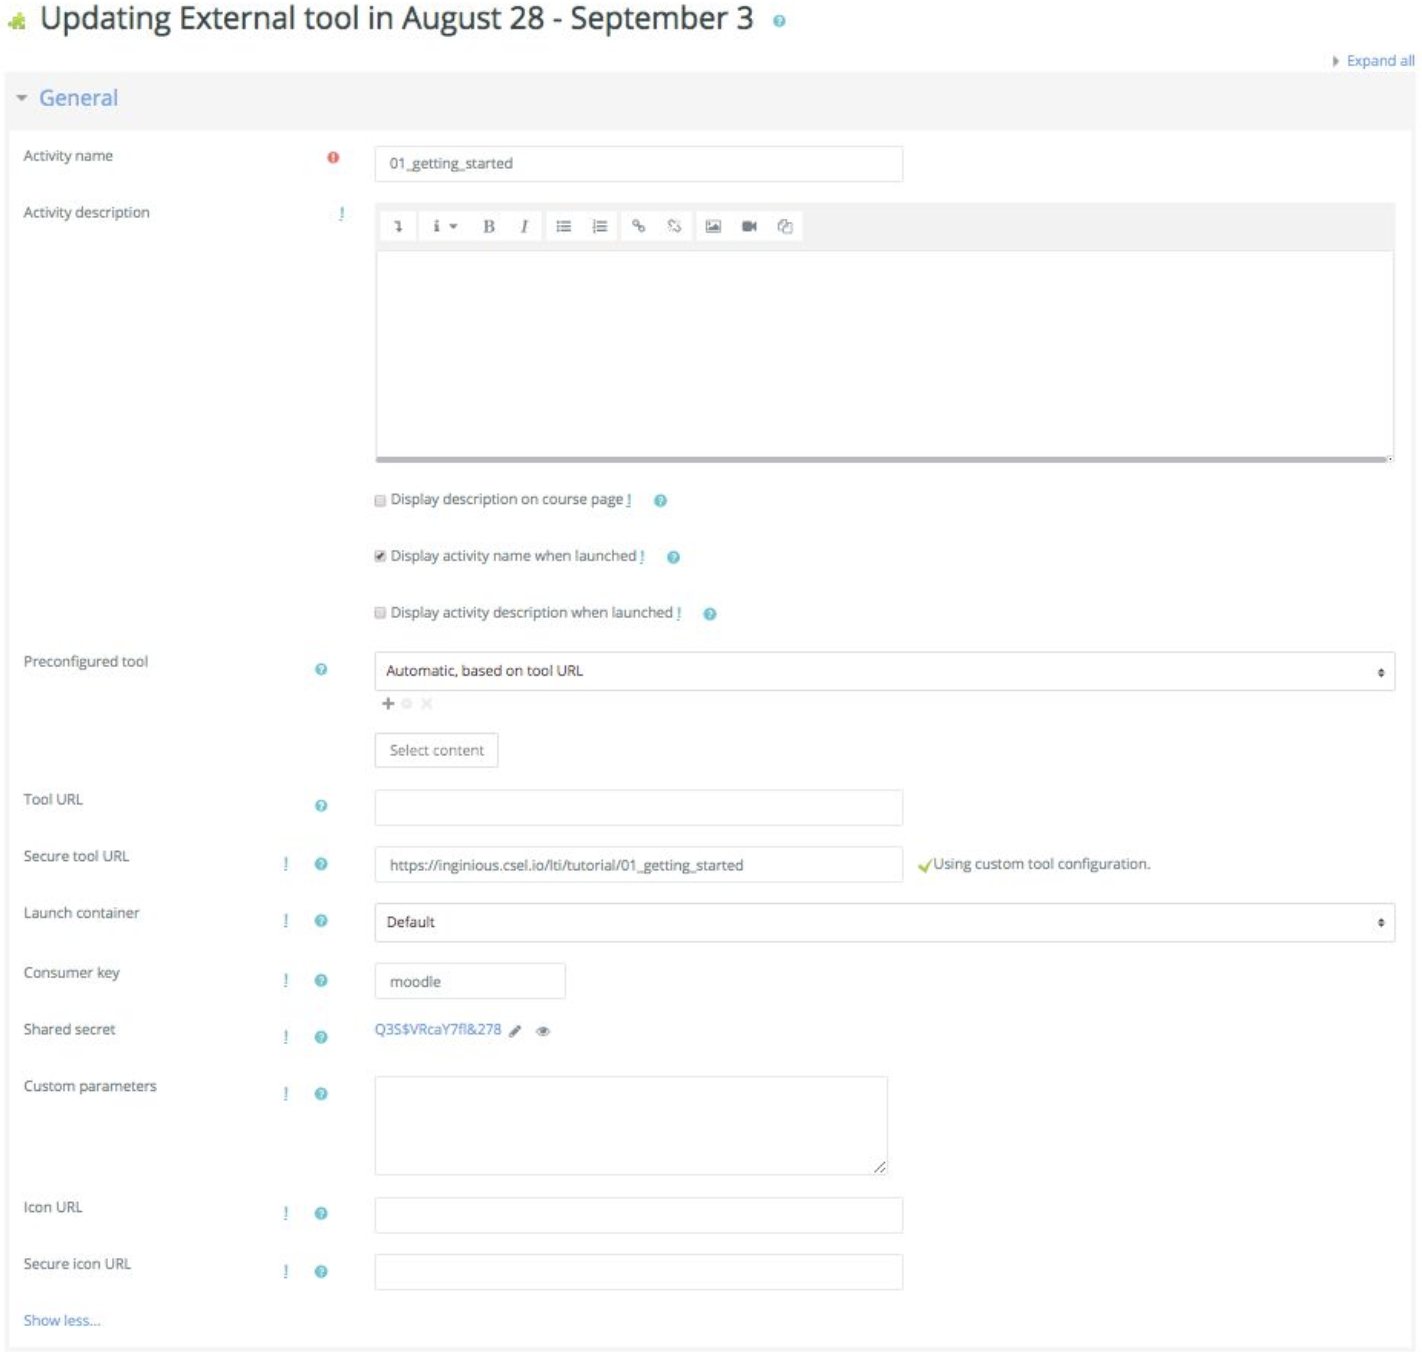
- Enter the following information for the LTI tool under the General Section.
- Activity name: A activity name. Typically you would use the task name you assigned in INGINious.
- Activity description: A optional description.
- Preconfigured tool: Automatic, based on tool URL
- Tool URL: Leave blank
- Secure tool URL: https:///inginious.csel.io/lti/
/<task_id> - Launch container: Select one your prefer. This is just a UI setting.
- Consumer key: The consumer key you entered in the LTI course setup in INGInious
- Shared secret: The secret key you entered in the LTI course setup in INGInious
- Custom parameters: Leave Blank
- Icon URL: Leave Blank
- Secure icon URL: Leave Blank
The example below uses the tutorial’s “01_getting_started” task via LTI.
- Check all the boxes under the Privacy section.

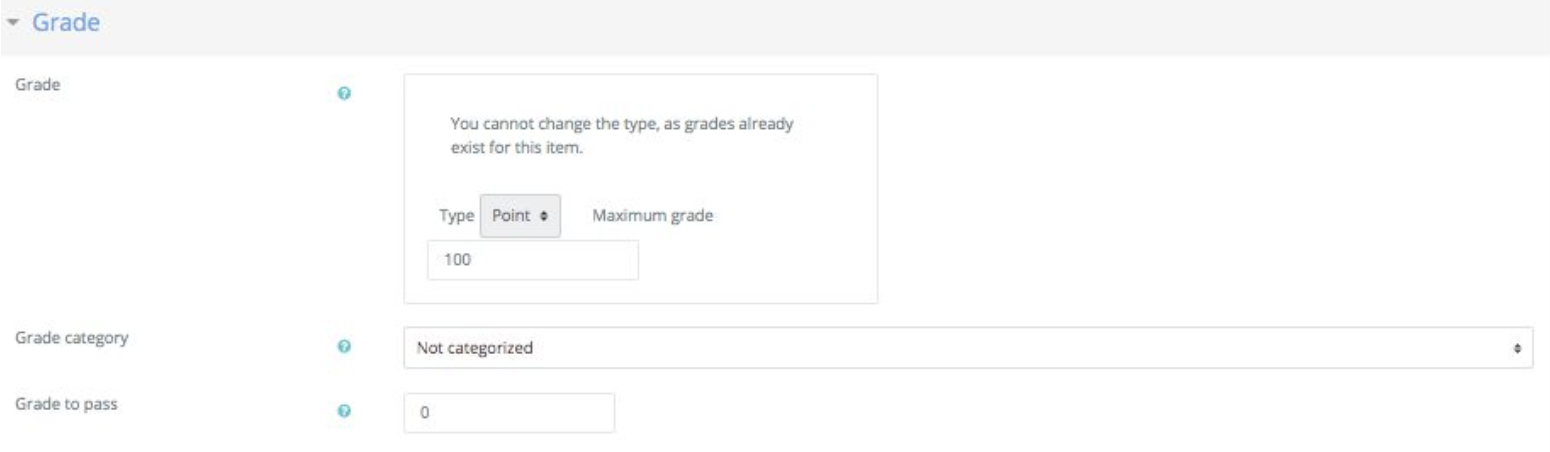
- Select the desired grade options. This will pass a grade back to the gradebook for thisActivity Name.
- Select the desired Common module settings.

- If you want to restrict access such as a date you can set this here.

- Enter any tags you may have. These can be blank.

- Enter any competencies as desired. These can be blank.

- When you done entering all the info above, click “Save and display” at the bottom of the page. It should open a new page showing your LTI task you created. See example below.
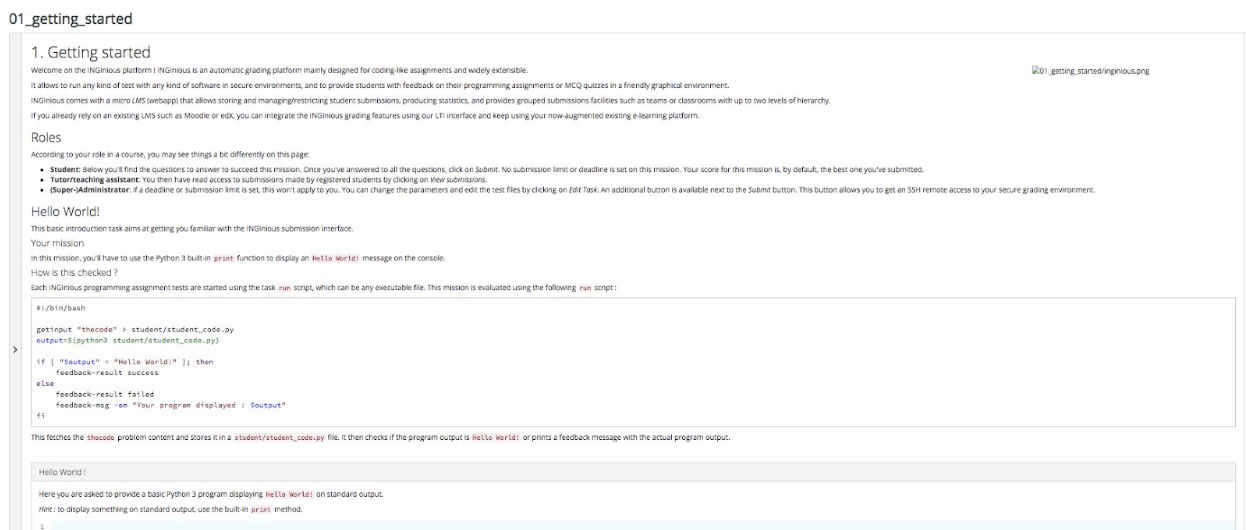
If you reach this screen, your LTI has been setup correctly and students can begin using the activity.
Note, when students interact with the INGInious for the first time, it will require the student to:
- Create a new account in INGInious
- Bind their username with their Moodle account.
Once the above is done, then students can then begin taking the INGINious tasks. They only need to go through this process once. The student will show up as FirstName.LastName as seen in Moodle in INGINious. The actual user ID they created in INGInious can be different from their CU identikey as the LTI application layer takes care of the mapping between IDs.
Binding Moodle and INGInious
- Login to INGInious using your Identikey login by clicking on the Google Login
- Username like that used to sign into Gmail (e.g. abcd1234@colorado.edu)
- Password is your identikey password (The same one you use for Moodle, MyCUInfo, etc)
- When prompted to create an account, provide your identikey Username and save
- DO NOT provide a password
- Click the Bind Account button